
Setting up a device for internet access needs careful planning. This is true whether you’re setting up a home office or a corporate workstation. This network setup guide makes it easy for both wired and wireless connections. It ensures they work well with what you already have.
Modern computer networking basics focus on three key areas: hardware, security, and signal quality. Wired setups use Ethernet cables for a stable connection. Wi-Fi is better for mobile devices, giving you more freedom.
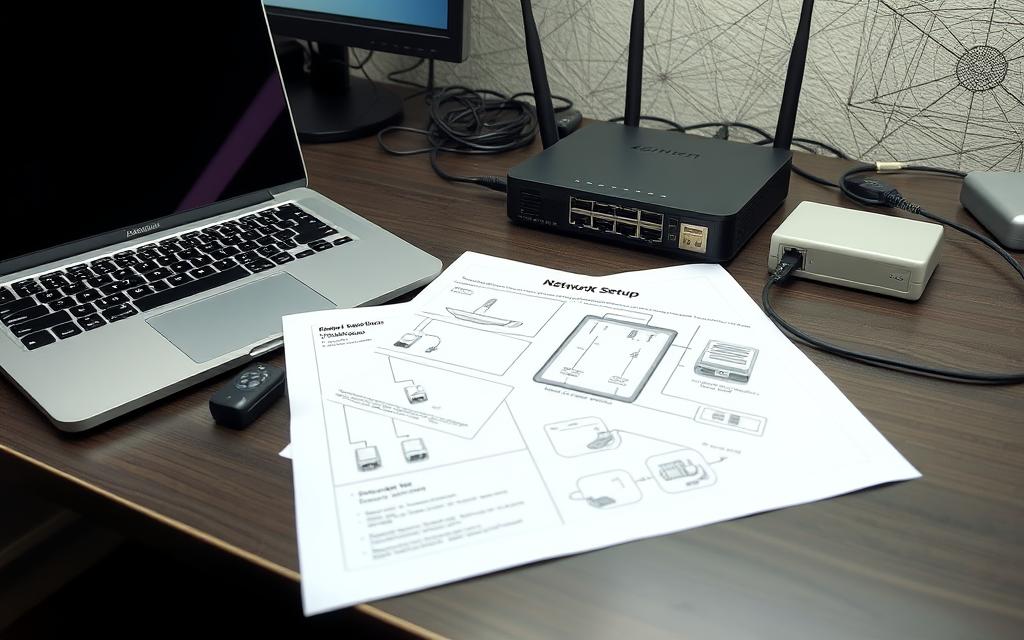
Start by getting the right tools – routers, cables, and login details. Make sure your computer’s network settings match your router’s. Many people forget to update their router’s firmware, which can solve many problems before they start.
This guide is designed for American homes and businesses. It covers the needs of local ISPs. Follow our steps to set up reliable connections for streaming, remote work, and smart home devices.
Preparing Your Computer and Network
Getting your network ready starts with checking your hardware and making sure everything is set up right. This helps avoid problems and makes sure your devices work well together.
Checking Hardware Compatibility
First, check what kind of modem you have. It could be fibre-optic, cable, or DSL. Knowing this helps you figure out what ports and adapters you need.
Essential ports and adapters
- Look at your Ethernet/Wi-Fi adapters in Windows Device Manager or Mac System Report
- Make sure your ports match your modem’s
- Try USB-C to Ethernet converters if you have a modern laptop
Router firmware requirements
Before adding new devices, update your router’s software. Most routers have:
- Automatic update options in admin settings
- Security patches for WPA3 encryption
- Updates for better network compatibility
Gathering Necessary Equipment
Having a network hardware checklist helps avoid problems during setup:
Related Posts:


Ethernet cables (Cat 6 recommended)
- They support speeds up to 10 Gbps over 55 metres
- They have better interference shielding than Cat 5e
- They work with older routers too
Wireless network adapters
Go for dual-band adapters that work on both 2.4 GHz and 5 GHz. PCIe cards are usually better for desktops than USB ones.
Updating Operating System Software
For the best router compatibility, make sure your OS is up to date:
Windows Update/MacOS Software Update
- Turn on automatic security updates
- Get the latest network improvements
- Reboot after big updates
Driver installation best practices
- Get drivers from the hardware maker’s website
- Check the digital signature before installing
- Make a system restore point before updating
How to Connect a New Computer to Your Network: Connection Types
Modern networks offer many ways to connect, each with its own benefits. Whether you need speed, flexibility, or reliability, knowing your options is key. This is true for both home offices and gaming setups.

Wired Ethernet Connections
For those who want the most stable connection, wired options are the best. Let’s look at two main types:
Advantages of Cat 6 Cabling
Cat 6 cables offer 10Gbps speeds, perfect for tasks like 4K video editing or big file transfers. They also have better shielding to reduce interference in busy networks. Plus, they support up to 250MHz bandwidth, making them future-proof.
Using Powerline Adapters as Alternative
If you can’t drill walls, Powerline adapters are a good choice. TP-Link’s AV2000 models can reach 2,000Mbps speeds. But, the actual speed depends on your wiring’s quality and complexity.
Wireless Network Options
Wi-Fi is popular for its ease of use. But, not all Wi-Fi standards are created equal. Here are some things to consider:
Understanding Wi-Fi Standards (802.11ac vs Wi-Fi 6)
Wi-Fi 6 (802.11ax) is better than 802.11ac in several ways:
- It can handle 4x more devices in crowded areas
- It’s 25% faster thanks to OFDMA technology
- It also helps devices last longer on battery
“Wi-Fi 6’s 1024-QAM modulation increases throughput by 25% compared to 256-QAM in older standards.”
Dual-Band Router Configurations
Today’s routers can broadcast on both 2.4GHz and 5.8GHz frequencies at the same time. The 5GHz band is better at avoiding interference but has a shorter range. Here’s a guide to help you choose the right band:
| Scenario | 2.4GHz | 5GHz |
|---|---|---|
| Large homes | ✓ Better wall penetration | ✗ Limited range |
| Gaming/streaming | ✗ Higher latency | ✓ Lower interference |
Establishing Wired Connections
Wired networks are the best for speed and stability at home and work. This guide will help you set up a reliable connection in three easy steps.
Step 1: Physical Connection Setup
First, find your device’s Ethernet port. It’s marked with a square icon with three horizontal lines. Routers usually have four LAN ports, and modems use coaxial cables for internet.
Proper Ethernet Port Identification
Look for RJ45 sockets on your computer and router. They are wider than phone jacks. DSL users should install filters on voice lines to avoid signal problems.
Testing Cable Integrity
Check cables for damage before plugging them in. Use a multimeter to test wire function. A reading of 1-50Ω means it’s working right. Replace cables with readings over 100Ω.
Step 2: Network Configuration
Most networks use DHCP setup automatically. But, sometimes you need to set it up manually.
Automatic DHCP Configuration
Go to Network Settings > Ethernet Status > Properties. Make sure ‘Obtain IP address automatically’ is on. Your router will give you an IP address in about 30 seconds.
Manual IP Address Assignment
For a static manual IP configuration, pick an address not in your router’s DHCP range. Use subnet mask 255.255.255.0 and your router’s IP as the default gateway.
Step 3: Connection Verification
Make sure your network is working by checking software and hardware.
Using Command Prompt for Ping Tests
Open Command Prompt and type ping 8.8.8.8. If you get responses under 100ms, you’re connected. More than 5% packet loss means there’s a problem.
Troubleshooting Link Status Lights
Router Ethernet ports should have steady green lights for a connection. Amber blinking means there’s an error. Try reseating cables or using different ports. No light means bad cables or a disabled adapter.
Configuring Wireless Access
Setting up a wireless connection needs careful steps. You must find networks, secure your login details, and tweak settings for the best performance.

Step 1: Network Discovery
Today’s operating systems make finding networks easy. In Windows 10/11, look for the network icon in the system tray. Click it to see a list of networks by signal strength.
Accessing Network List in System Tray
The menu shows both 2.4GHz and 5GHz networks. Networks with padlock icons need login details. Open networks have empty shield symbols. Hover over each to see signal details.
Hidden Network Configuration
For hidden networks, choose ‘Hidden Network’ from the menu. You’ll need to enter:
- Exact network name (case-sensitive)
- Security protocol type (WPA2/WPA3)
- Pre-shared key
Step 2: Authentication Process
Modern networks use strong encryption to keep data safe. The WPA3 security protocol is the latest standard. It offers:
- 192-bit enterprise-grade encryption
- Protection against brute-force attacks
- Forward secrecy for data transmissions
Enterprise Network Considerations
Business networks often use RADIUS servers with 802.1X authentication. When connecting to these networks:
- Select ‘Windows Hello for Business’ or ‘Certificate’ authentication
- Provide domain credentials when prompted
- Verify server certificates match IT department specifications
Step 3: Advanced Settings Customisation
Advanced users can fine-tune their connections. These tweaks are useful for crowded networks or specific needs.
DNS Server Configuration
To change your DNS, go to:
- Network Properties → Internet Protocol Version 4 (TCP/IPv4)
- Enter your preferred/alternate DNS addresses
- Popular choices: Google (8.8.8.8) or Cloudflare (1.1.1.1)
Setting Metered Connections
Under ‘Network & Internet’ settings, enable this feature to:
- Limit background data usage
- Delay Windows updates
- Save mobile data
Network Settings Optimisation
Improving your network settings makes sure devices talk to each other smoothly. It also keeps your data safe. This makes sharing resources easier and teamwork better between Windows and macOS.
Configuring Workgroup/Domain Settings
Putting devices in the same network group helps them work together well. Here’s how to do it right for each platform:
Windows Network & Sharing Centre
Go to Control Panel > Network and Internet to change workgroup names. Make sure all devices have the same name in the workgroup. Use Advanced sharing settings to set who can find your devices.
MacOS Network Preferences
Open System Preferences > Network to join a workgroup. Mac users need to turn on SMB browsing support to connect with Windows. After making changes, restart your devices for them to take effect.
Enabling File and Printer Sharing
Sharing files and printers across different platforms needs careful setup. Follow these steps for safe sharing:
SMB Protocol Configuration
Windows users should turn on SMB 3.1.1 in Turn Windows features on/off. MacOS supports SMB by default, but check the version in Connect to Server. This SMB protocol setup stops login problems between systems.
User Permission Management
Here’s how to set up network permissions:
- Create the same user accounts on all devices
- Give read/write access through folder settings
- Use strong passwords for shared folders
“Always use unique passwords for network shares – using the same password is risky.”
Troubleshooting Common Issues
Even the most well-set-up networks can face unexpected problems. These can stop devices from connecting. To fix these issues, we use specific steps to find and solve the problems.

Diagnosing Connection Problems
Begin with tools like the Windows Network Troubleshooter. It finds issues like missing IP settings or wrong DNS info:
Using Windows Network Troubleshooter
- Right-click the network icon in your system tray
- Select “Troubleshoot problems”
- Follow on-screen instructions to apply fixes
Router Log Analysis Techniques
Check router logs for error codes or strange access attempts. Look for patterns in connection timeouts or DHCP errors. These often show signal problems or device conflicts.
Resolving IP Conflicts
Duplicate IP addresses cause “network identity crisis” errors. We solve these with two main methods:
Releasing/Renewing DHCP Leases
- Open Command Prompt as administrator
- Type ipconfig /release and press Enter
- Then, type ipconfig /renew to get new addresses
Static IP Management Strategies
For devices needing fixed addresses (like printers), reserve IPs in your router settings. This stops the DHCP server from giving those addresses to other devices.
For ongoing problems, you might need to reset your router or update its firmware. Always keep error messages and when they happened. These details are key for deeper troubleshooting.
Network Security Best Practices
Once you’ve set up your network, it’s key to focus on security. Taking steps to stop hackers and keep your data safe is vital. Here are some top tips to make your online space safer.

Essential Protection Measures
Enabling Windows Defender Firewall
Microsoft’s firewall is your main defence. Turn it on through System Settings > Update & Security > Windows Security. For better protection:
- Customise inbound/outbound traffic rules
- Enable stealth mode to hide devices from network scans
- Create application-specific permissions
Configuring Router Admin Passwords
Default passwords like ‘admin/admin’ are a big risk. Change them right away when you first set up:
“81% of router hacks exploit factory-default passwords” – Cybersecurity Audit Report 2023
Choose strong passwords (12+ characters with symbols) and avoid using personal info. Always use WPA3 encryption for wireless networks.
Ongoing Maintenance
Firmware Update Schedules
Updating your router’s firmware fixes bugs and boosts performance. Manufacturers usually release updates:
- Quarterly security patches
- Biannual feature upgrades
- Emergency fixes for critical exploits
Set up automatic updates or use calendar reminders for manual checks.
Network Monitoring Tools
Keeping an eye on your network is key. Good tools include:
- Wireshark for traffic analysis
- SolarWinds for bandwidth monitoring
- PRTG Network Monitor for real-time alerts
These tools spot unusual activity and possible threats early on.
Maintaining Your Network for Long-Term Performance
Adding a new computer to your network needs careful planning. You must set up both wired and wireless connections correctly. This ensures your network works well.
Start by making physical connections, then set up wireless authentication and security. Make sure workgroup settings and sharing permissions are right. This helps devices work together smoothly.
Keeping your network safe is an ongoing task. Regularly check your firewall and update firmware to avoid security risks. Check router settings monthly and user access permissions every three months.
Tools like Bitdefender BOX or Norton Core help monitor threats in real-time. They make it easy to keep your network safe without hassle.
It’s also important to keep your network equipment in good shape. Replace old Ethernet cables and update wireless access points to support Wi-Fi 6. Use tools like GlassWire or NetSpot to find and fix bandwidth problems early.
By following these steps, you can make your network strong and reliable. Regular maintenance and the latest security measures keep your data safe. This way, your network stays up-to-date and secure, supporting your work and personal life.
FAQ
What hardware is required for fibre-optic broadband connections?
For fibre-optic broadband, you need modems with SFP connectors. These convert optical signals. Traditional broadband uses coaxial cables with F-type screw terminals.
Always check if your network adapter is listed in Windows Device Manager under “Network adapters”.
Why should I prioritise Cat 6 cabling for wired networks?
Cat 6 cables support speeds of 10Gbps over 55 metres. They also have better interference shielding than Cat 5e. This makes them perfect for tasks like 4K video streaming or large file transfers.
How do Powerline adapters compare to Ethernet cabling?
Powerline adapters use your home’s electrical wiring for data. They’re great for areas hard to wire. But, they’re slower (1-2Gbps) than Cat 6 Ethernet and can be affected by circuit breaker issues.
What advantages does Wi-Fi 6 offer over 802.11ac?
Wi-Fi 6 (802.11ax) offers 40% more throughput. It also works better in crowded areas with OFDMA technology. For the best performance, use the 5GHz band to avoid microwave oven interference.
How can I test Ethernet cable continuity without specialist tools?
Use a multimeter in continuity mode. Touch one probe to an RJ45 pin and the other to its switch port contact. A complete circuit will show near-zero resistance (0-2Ω).
What security improvements does WPA3 provide for wireless networks?
WPA3 uses 192-bit enterprise-grade encryption. It also protects against brute-force attacks and offers forward secrecy. Enable it through your router’s admin panel. Use Windows Wi-Fi Protected Setup (WPS) for easy device pairing.
How do I resolve cross-platform file sharing between Windows and macOS?
Enable SMB v3 in Windows Features. Then, set up macOS to use SMB via “Connect to Server”. Make sure workgroup names and NTFS permissions match to avoid “network credentials” errors.
What’s the proper method to resolve IP address conflicts?
Use ipconfig /release followed by ipconfig /renew in Command Prompt. For ongoing problems, set up static IP reservations in your router’s DHCP settings based on device MAC addresses.
Why are quarterly firmware updates critical for network security?
Firmware updates fix vulnerabilities like CVE-2023-1389 (TP-Link API exploits). They also improve hardware compatibility. Use WPA3 encryption and disable WPS for a strong security setup.
How can Wireshark improve my network troubleshooting?
Wireshark lets you analyse packets for latency spikes, malicious traffic, or protocol errors. Use display filters like “tcp.analysis.retransmission” to spot connection problems.
What DNS configuration optimises streaming performance?
Use DNS-over-HTTPS with providers like Cloudflare (1.1.1.1) or Google (8.8.8.8). This avoids ISP throttling and reduces latency, making it great for 4K streaming.
How do I configure enterprise-grade wireless authentication?
Set up a RADIUS server (e.g., Windows NPS) for 802.1X authentication. This allows certificate-based logins, device isolation policies, and granular access controls. It’s essential for GDPR-compliant networks.